Calibration Basics Part V - Equipment Accuracy

This is Part V of our Calibration Basics Series.
In Part I, we looked into the general overview of what calibration is. While a rather simple concept, it is still extremely important to keep those basics straight.
In Part II, we dove into what happens when your calibration process finds a piece of equipment to be reading off.
In Part III, we discussed the most important cornerstone affecting accuracy in calibration, traceability.
In Part IV, we tackled the topic of measurement uncertainty and how it affects every measurement you complete.
Welcome to the final post in our Calibration Basics Series! If you have been following, you now have a solid understanding on exactly what calibration is, where adjustment fits into the calibration process, how traceability is the most important cornerstone in the calibration process and how measurement uncertainty throws a wrench into all of this.
However, as mentioned in Part IV, all of these things are affected by the overall accuracy of the tool you are using. So what is this accuracy affect everything else, after all?
Equipment Accuracy
The final piece of this puzzle is the equipment's accuracy. This is also referred to as its resolution, tolerance or discrimination as well.
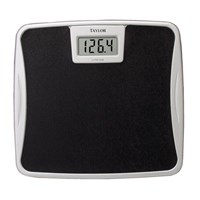
Essentially, the equipment's accuracy is the minimum increments of measure that it can read. Looking back at our bathroom scale example, to determine the tolerance of the scale, you simply need to find the smallest increment of measure it can handle. Often times this is 1/10th of a pound.

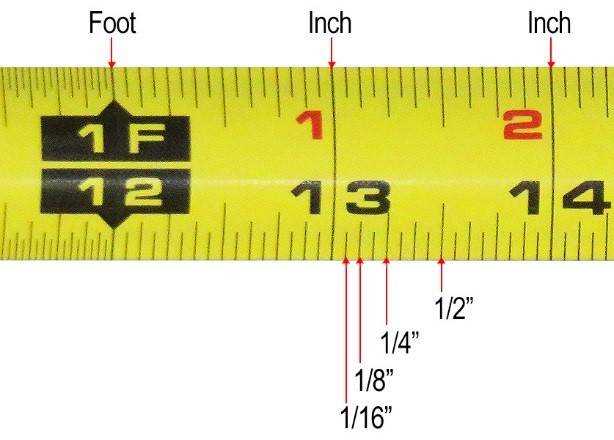
Another common example of this would be a common tape measure. Everyone has used a tape measure, right? Those little lines on it define the accuracy of the tool. Most commonly, those lines denote 1/16th of an inch. That means, the most accurate that tape measure can read is +/- 1/16th of an inch.


Bringing it back into the quality world, we can look at the most common measuring device on the planet, the caliper. If you are using a digital caliper, the last digit shows how accurate the tool is (its resolution). If this tool reads out four decimal places (i.e. 0.0000") the accuracy of this tool is 1/10,000th of an inch, or "one tenth" as it is commonly called in the industry (yes, this confused me at first too).
However, be careful though. Just because it reads to this number does not mean that is its actual accuracy. Many times, tools will round this last digit to either a 0 or a 5. This means that the accuracy of this caliper would be 5/10,000th of an inch, or "half a thou" as it is commonly called in the industry (at least this one is less confusing).
Importance of Equipment Accuracy
It is important to understand a piece of equipment's accuracy because of the Test Uncertainty Ratio, mentioned in Part IV. If you are following the 10:1 rule discussed there, you must utilize a piece of equipment that is ten times more precise than the part you are measuring.
For the sake of an example, let's say that you are creating a part that is to measure 1" in width with an acceptable tolerance of +/- 0.005". This means that the caliper described above, would meet the accuracy requirement, as it's accuracy is +/- 0.0005".
If you were using anything less accurate, the uncertainty of your measurement could inadvertently lead you to incorrectly fail a perfectly fine part. Or example, let's say that instead of a caliper with the +/- 0.0005" accuracy, you instead use one that is +/- 0.005", a full factor of 10 times less accurate. By using this tool, the accuracy of the tool ALONE eats up your entire acceptable tolerance limit on the part. In other words, the part could be only 0.001" larger than required, but the accuracy of the tool could make it so that the tool reads a full 0.006" larger, thus causing a rejected part.
How Equipment Accuracy Affects Calibration
Now, tying everything full circle, you should hopefully be able to see how this ties back into the concepts of traceability and measurement uncertainty and why those concepts are imperative to a proper calibration.
As discussed, as we continue up the traceability chain, all the way back to the NIST standard, every calibration must include some form of measurement uncertainty. It is impossible do so accurately, without first understanding how the accuracy of a piece of equipment affects this.
Let's say the uncertainty of your measurement takes up a large percentage of the acceptable tolerance of a piece of equipment. For example, if you are using a standard to calibrate the tape measure mentioned above, and this standard is only accurate to 1/32nd of an inch, the uncertainty of measurement now eats away 50% of the tolerance of that equipment. This could lead to incorrectly failing a perfectly fine tape measure. This would happen if the tape measure is simply 1/30th of an inch off.
However, if the standard used were significantly more accurate (thus a lower uncertainty), the tape measure would be pass calibration appropriately.
The good news is, when it comes to calibration grade standards 1/32nd of an inch may as well be a mile. By using an ISO 17025 accredited calibration provider, such as Fox Valley Metrology, you can ensure that they are using tools of the appropriate accuracy of the job. In fact, as I write this, our third party auditors are in the building verifying this exact fact (yay, audits...).
Thank you for following along with our Calibration Basics Series. If you haven't read through each article, please do so now!
With this level of knowledge, you will be able to outpace most other people in the quality industry. Unfortunately, calibration tends to be looked at as a bit of "black magic" without the proper understanding of what goes on. By taking on this skillset, you will now be able to make significantly more informed decisions with your quality program.
Thank you for reading along!
Interested in having your gages calibrated? Check out our Calibration Services today!
