Steve has been around the calibration industry his whole life. His father, Mark Toll, founded Fox Valley Metrology in 1996, when Steve was only 6 years old. Steven went on to graduate from Milwaukee School of Engineering, one of the most challenging and accolated technical universities in the country. This lifelong immersion in the industry has led him to become the Vice President of Sales for Fox Valley Metrology since 2014.
Thread Inspection 101 Part VII - Thread Rings

This is Part VII of our Thread Inspection 101 Series.
In Part I, we discussed the basics of thread measurement and dove into what thread gages are. In Part II, we discussed the basics of thread form. In Part III, we discussed the intricacies of the Imperial thread designation system, while in Part IV, we discussed the intricacies of the Metric thread designation system. In Part V, we dove into the complicated world that is the theory behind thread inspection. Finally, in Part VI, we pulled it back into the practical realm and investigated the design and manufacture of thread plugs.
Now that we have gained a full grasp on the dynamics of the thread plug, it is time to explore the other 50% of the equation, thread rings.
As discussed in Part V, the complex geometry of thread inspection is prohibitive for most inspections needed on the shop floor. It is just not practical to complete a full dimensional inspection of every threaded component that leaves your facility.
Luckily, we have thread gages available as a very quick check for all threaded components. There are two main thread gages: the thread ring for inspecting external threads and the thread plug for inspecting internal threads. This gaging system allows us to shorten inspection times down to a matter of seconds for each component. As a result of this tremendous efficiency, thread gages have become ubiquitous in machining centers around the world and are now one of the most common gages in existence.
We will complete our deep dive into thread gages with a much closer look at thread rings and their usage.
Thread Ring Design
Much like their cousins, thread plugs, thread rings are machined Go/No-go gages that contain internal threading, machined to a very specific thread size. They are used for checking externally threaded components (i.e. bolts).
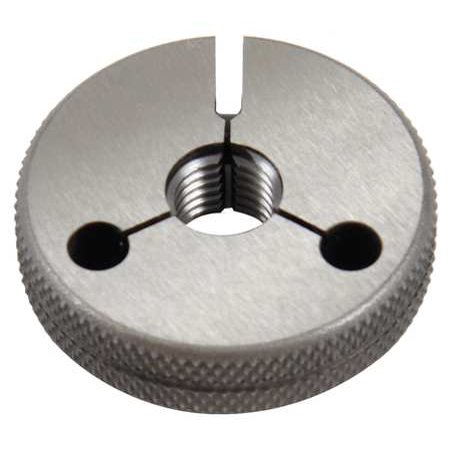


All thread rings are classified as an attribute gage, meaning they do not provide feedback on what the exact size of the dimension is. They are performing a functional inspection to verify that the internal threads being inspected are within the accepted tolerance.
Most commonly, thread rings come in a set, containing a Go ring and a No-Go ring. More on this later.
Thread rings are manufactured to two primary designs, fixed and adjustable.
Fixed Thread Rings
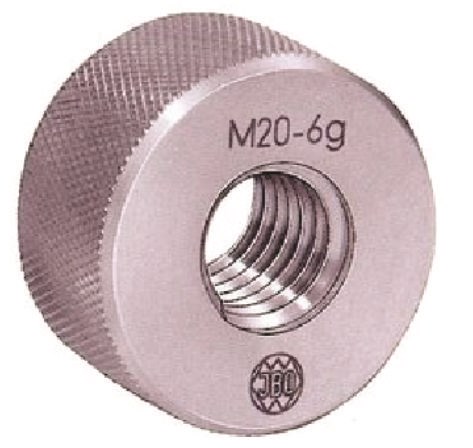
Fixed thread rings are exactly that, rings that are fixed in their exact size. They are a very simple and easy to use gage. There is no way to adjust these rings after they are used. However, they are often cheaper than their adjustable counterparts.
Adjustable Thread Rings
To combat the lack of adjustability in a fixed thread ring, adjustable thread rings were created in the World War II era. By adding in several key features, thread rings were now able to be adjusted as they wore down, saving considerable life cycle cost to the owner. Additionally, small imperfections in the manufacturing process may not necessarily require a complete rework of the gage, as it could simply be adjusted into tolerance.
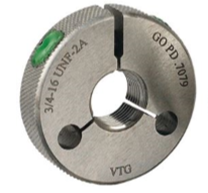
The most common design for an adjustable thread ring is the American Gage Design (AGD) thread ring, shown below.
Another style, although less common is the Southern style thread ring, shown below.
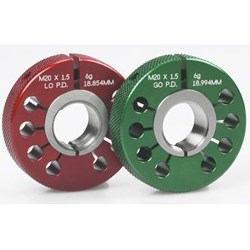
Since the AGD design is significantly more common, that is what we will discuss here. As you see below, the ring has several key components which allow the ring to be adjusted.
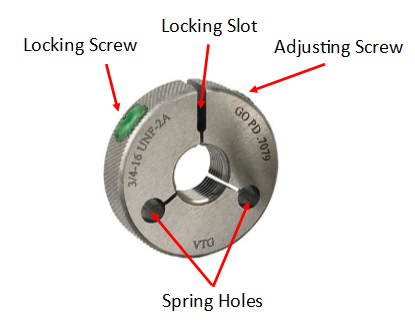
We will dive into the full process of adjusting a thread ring in Part VIII, but the basic idea is this. As a thread ring needs adjusting, the locking screw is loosened. Then, the adjusting screw can be turned in either direction to either expand or contract the pitch diameter of the ring. Clockwise tightens the gage; counter-clockwise loosens it.

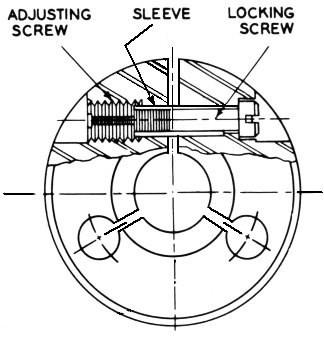
When doing so, the locking slot will expand or contract accordingly, because of the leeway given in the spring holes.
It is best practice to place tamper proof wax into the slots where the screws are located. By doing so, you will both protect the screws themselves as well as create a way of knowing whether a gage was adjusted or not. Also, it is best practice to color code this wax - green for Go rings and red for No-Go rings.
Go Thread Rings
The Go thread ring is machined to a minus tolerance making it so the member is at the maximum material limit.
Usage
The Go ring is used for verification of an externally threaded component.
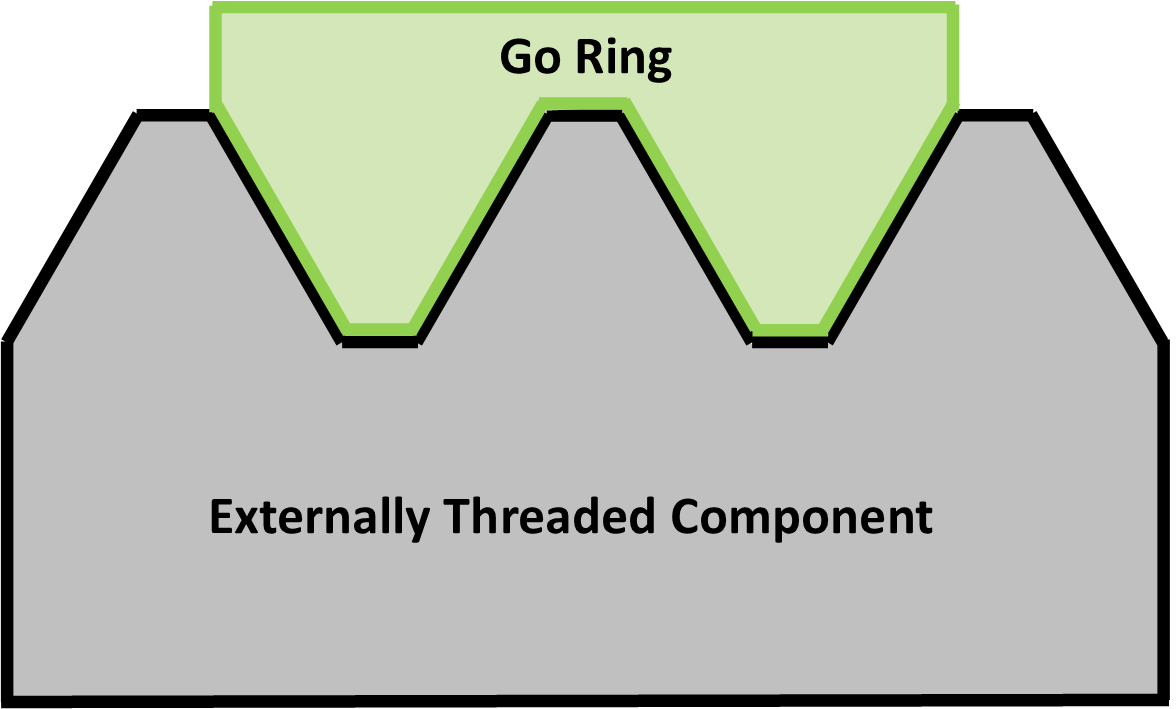
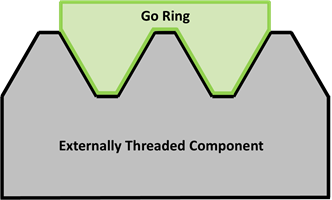
It inspects the following:
- Maximum allowable minor diameter
- Maximum allowable pitch diameter
- Flanks
- Lead
In use, the operator is to thread the Go member onto the externally threaded component. The member should pass freely and easily across the whole length of the component. If it makes it all the way across the thread, the part passes. If it gets stuck or requires any use of force to make the member thread, the product is smaller than the minimum allowable size and should be failed.
Understanding this is very important. Sometimes, you can force the gage across the product. However, doing so is not doing anyone any favors. Forcing the Go member through the component can actually "grind" down the product making it seem like it is acceptable. This act will compromise the integrity of it. Additionally, it will slowly but surely wear out the plug member as well.
No-Go Thread Rings
The No-Go thread ring is machined to a plus tolerance making it so the member is at the minimum material limit. The No-Go ring commonly is machined with a ground down crest, as this portion of the plug is not used needed.
Usage
Obviously, like the Go ring, No-Go thread ring is used used for verification of an externally threaded component.
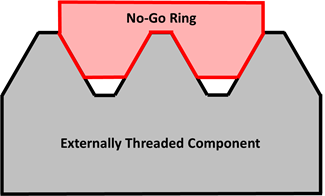
However, it is only used to inspect the maximum allowable pitch diameter. (Side note: you may have noticed that neither Go nor No-Go rings address the minor diameter of a component. If required, this check must be performed by other means, such as a bore gage).
In use, the operator is to thread the No-Go member onto the externally threaded component. Unfortunately, there is a difference in the criteria on when to pass a product between the inch and metric system. For the inch (Imperial) system, the No-Go ring should not pass more than three complete turns onto the product. If, of course, the product is thin and has less threads than that, modification of this rule would be required. For the metric system, the criteria is that the plug should have a definite drag before the second turn.
If the No-Go member engages with the product more than the allotted amounts for either system, the product being inspected is larger than the maximum allowable size and should be failed.
Ring Gage Wear Plane
As any thread gage is used, ring or plug, you are rubbing metal against metal. Naturally, over time, the gage is going to wear down. What is interesting, is this wear will happen in the same spot pretty consistently over the life of the gage.

As seen here, this will create a scenario where the flank of the thread will actually have a "step" worn into it. The area that gets worn down is referred to as the "wear plane" of the gage. Unfortunately, when thread plugs get this, they cannot be adjusted and must be replaced. However, adjustable thread rings can, of course, be adjusted.
In Part VIII of our Thread Inspection 101 series, we will explore the process for adjusting thread rings.
Interested in having your thread gages calibrated? Check out our Thread Ring Calibration Services or our Thread Plug Calibration Services today!
Interested in purchasing a thread gage? Please submit a request today.
